-
FAQs
-
Sysrisk User Manual
-
- Step-by-Step Guide to SysRisk Purchasing Process
- Team or Enterprise License Purchase: Login and Profile Setting Process
- Password Management Process
- Company Profile in SysRisk
- User Creation and Role Assignment in SysRisk
- Customization and Dashboard Configuration
- Homepage Overview
- SysRisk Activity Logs
- Category Management for ERM
- Risk Approval Overview1
- Risk Entry Page for ERM
- Risk Entry Page for PRM
- Creating AI-Generated Risk Entries in SysRisk
- Risk Register Risk Prioritization Page Overview
- Risk Creation, Edit and Approval Process in SysRisk
- Risk Closure Process in SysRisk
- SysRisk Auditing Record Maintenance
- Risk Notification Settings
- Show Remaining Articles (3) Collapse Articles
-
-
Risk Management
-
- Control Risk
- ERM
- Inherent Risk
- Qualitative Risk Analysis
- Quantitative Risk Analysis
- Residual Risk
- Risk Acceptance
- Risk Acceptance Criteria
- Risk Aggregation
- Risk Analysis
- Risk Analysis Methods
- Risk Analytics
- Risk Appetite
- Risk Appetite Framework
- Risk Appetite Statement
- Risk Assessment
- Risk Assessment Matrix
- Risk Assessment Process
- Risk Attribution
- Risk Avoidance
- Risk Bearing Capacity
- Risk Benchmarking
- Risk Capacity
- Risk Capital
- Risk Clustering
- Risk Communication
- Risk Communication Plan
- Risk Concentration
- Risk Contingency
- Risk Contingency Plan
- Risk Control
- Risk Convergence
- Risk Criteria
- Risk Culture
- Risk Dashboard
- Risk Dependency
- Risk Diversification
- Risk Escalation
- Risk Escalation Path
- Risk Evaluation
- Risk Exposure
- Risk Financing
- Risk Framework
- Risk Governance
- Risk Heat Map
- Risk Horizon
- Risk Identification
- Risk Indicator
- Risk Intelligence
- Risk Interdependency
- Risk Inventory
- Risk Landscape
- Risk Management(RM)
- Risk Management Dashboard
- Risk Management Framework
- Risk Management Maturity
- Risk Management Plan
- Risk Management Policy
- Risk Mapping
- Risk Matrix
- Risk Maturity
- Risk Mitigation
- Risk Mitigation Plan
- Risk Mitigation Strategy
- Risk Model
- Risk Monitoring
- Risk Optimization
- Risk Owner
- Risk Ownership
- Risk Policy
- Risk Portfolio
- Risk Prioritization
- Risk Profile
- Risk Quantification
- Risk Reduction
- Risk Register
- Risk Register Update
- Risk Reporting
- Risk Resilience
- Risk Response
- Risk Response Plan
- Risk Review
- Risk Review Process
- Risk Scenario
- Risk Scenario Analysis
- Risk Scenario Planning
- Risk Scoring
- Risk Sensing
- Risk Sharing
- Risk Strategy
- Risk Taxonomy
- Risk Threshold
- Risk Tolerance
- Risk Tolerance Level
- Risk Transfer
- Risk Transparency
- Risk-Adjusted Return
- Show Remaining Articles (82) Collapse Articles
-
- Business Continuity Risk
- Capital Risk
- Competition Risk
- Compliance Risk
- Counterparty Risk
- Credit Risk
- Credit Spread Risk
- Currency Risk
- Cybersecurity Risk
- Deflation Risk
- Environmental Risk
- Ethical Risk
- Event Risk
- Financial Risk
- Foreign Exchange Risk
- Fraud Risk
- Geopolitical Risk
- Health and Safety Risk
- Human Capital Risk
- Inflation Risk
- Infrastructure Risk
- Innovation Risk
- Insurance Risk
- Intellectual Property Risk
- Interest Rate Risk
- Legal Risk
- Liquidity Risk
- Market Risk
- Model Risk
- Natural Disaster Risk
- Operational Risk
- Outsourcing Risk
- Political Risk
- Product Liability Risk
- Project Risk
- Regulatory Change Risk
- Regulatory Risk
- Reputation Risk
- Reputational Risk
- Resource Risk
- Sovereign Risk
- Strategic Alliance Risk
- Strategic Risk
- Supply Chain Risk
- Sustainability Risk
- Systemic Risk
- Technological Risk
- Technology Risk
- Show Remaining Articles (33) Collapse Articles
-
In SysRisk, the process of risk creation is the cornerstone of risk management. However, creating a risk entry is just the first step; for it to be considered active and operable data, the risk entry must be approved. This document outlines the steps involved in creating and approving risk entries, as well as the differences between the free individual version and the paid versions of SysRisk.
Overview of Risk Creation and Approval
- Free Version: Users have the ability to create and approve risks without additional permissions.
- Paid Versions: In a more structured environment, risk creation and approval follow a hierarchical workflow. General users need specific permissions to create risk entries in both the Enterprise Risk Management (ERM) and Project Risk Management (PRM) modules. Risks created by users must be submitted for approval to be officially recognized.
Once a risk is approved by the risk owner, it is added to the risk register and assigned a unique ID, marking it as active data.
Detailed Risk Creation Process
- Log In
- Users must first log in to their SysRisk account to access risk management features.
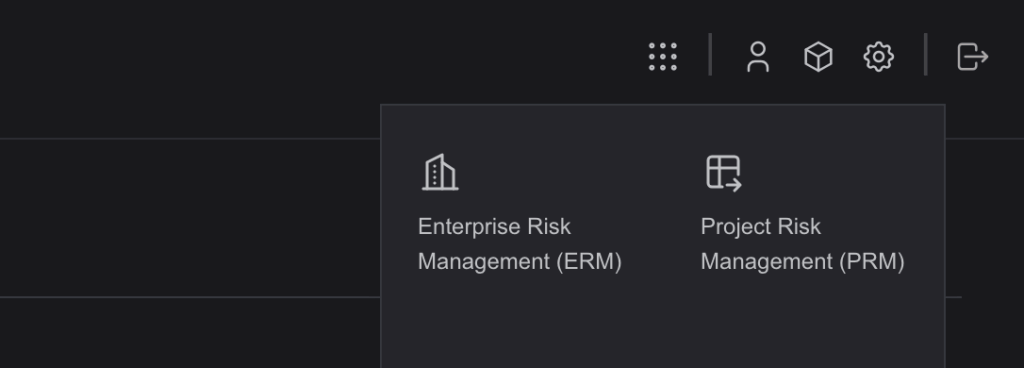
- Select the Module (ERM or PRM)
- After logging in, navigate to the intended module:
- ERM Module: Users need access to specific risk categories to create risk entries.
- PRM Module: Users must be added to specific projects to create risks related to those projects.
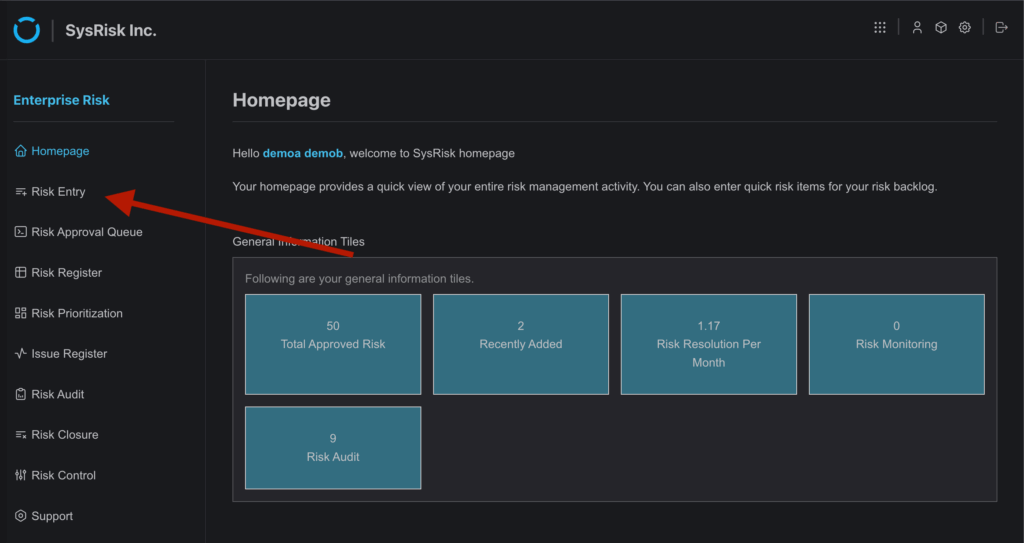
- Navigate to the Risk Entry Page
- Once in the desired module, proceed to the Risk Entry page.
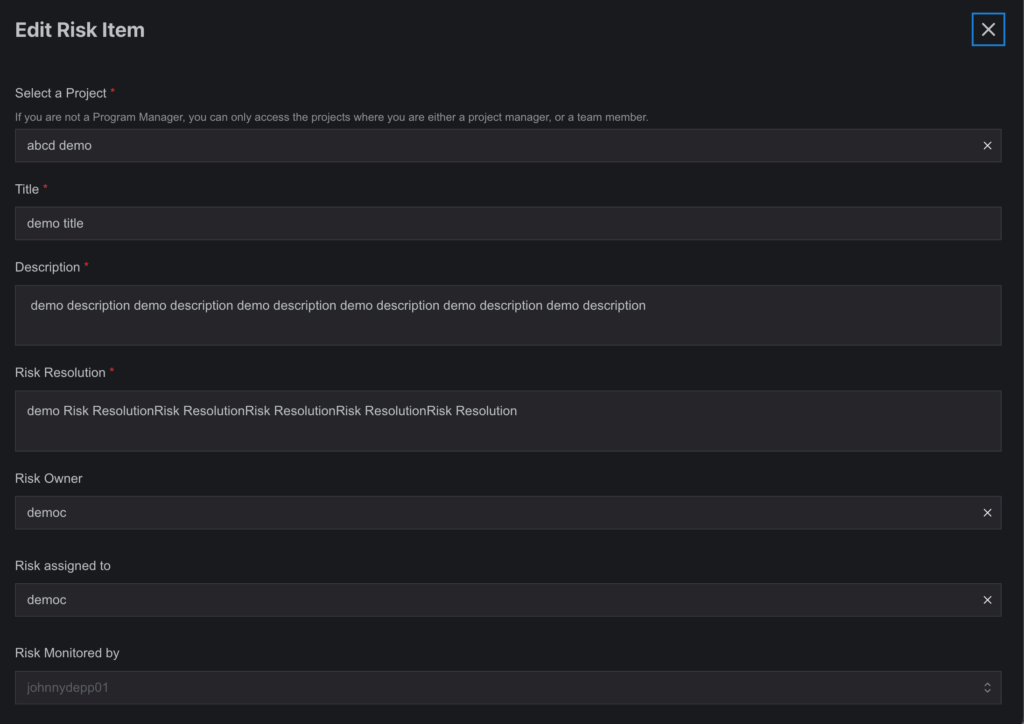
- Fill Out the Risk Entry Form
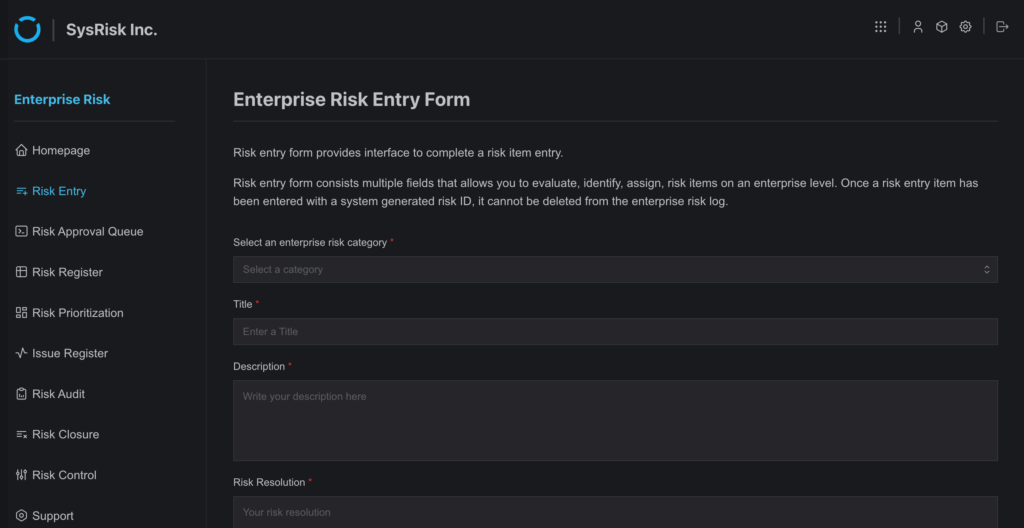
On the Risk Entry page, users must:
- Select a category (in ERM) or a project (in PRM) from the dropdown.
- Fill in the required fields with relevant risk information.
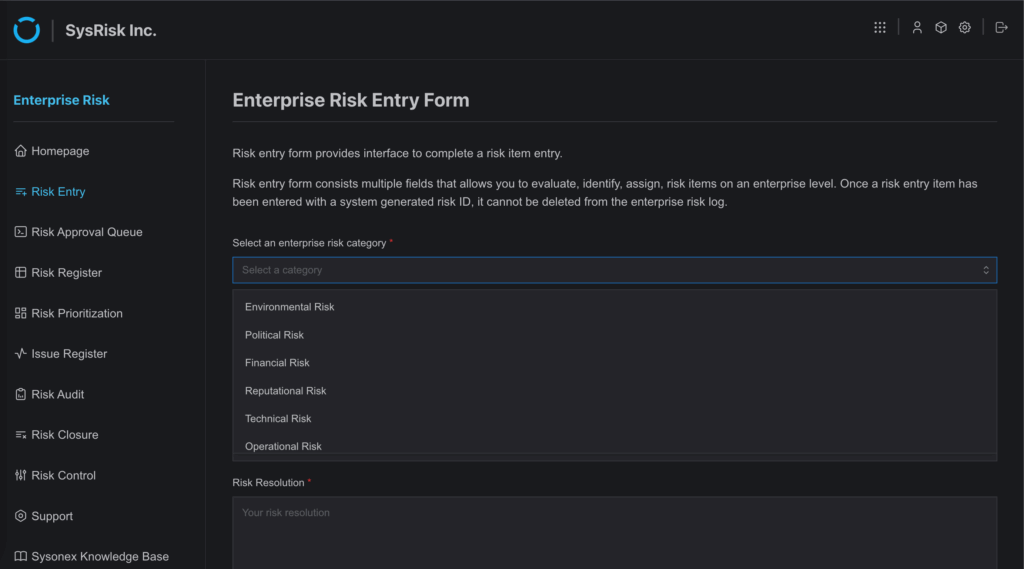

Note: General users can only select categories or projects that they have been granted access to by admins or product admins.
- Save or Submit the Risk for Approval
- After completing the form, users have two options:
- Save Risk: Save the risk entry for later editing or submission.
- Save and Request Approval: Submit the risk entry directly to the risk owner for approval.
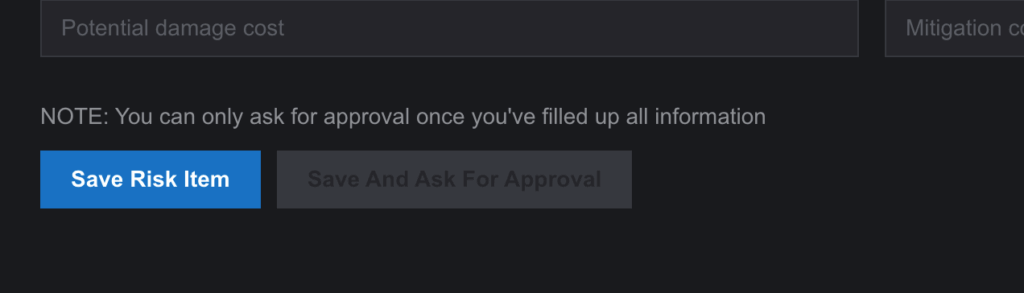
- Saved risks remain visible in the table beneath the form and can be edited until approved.
Risk Approval Process
Once a risk is submitted for approval, it appears in the Risk Approval page of the risk owner’s account. The risk owner has the following options:
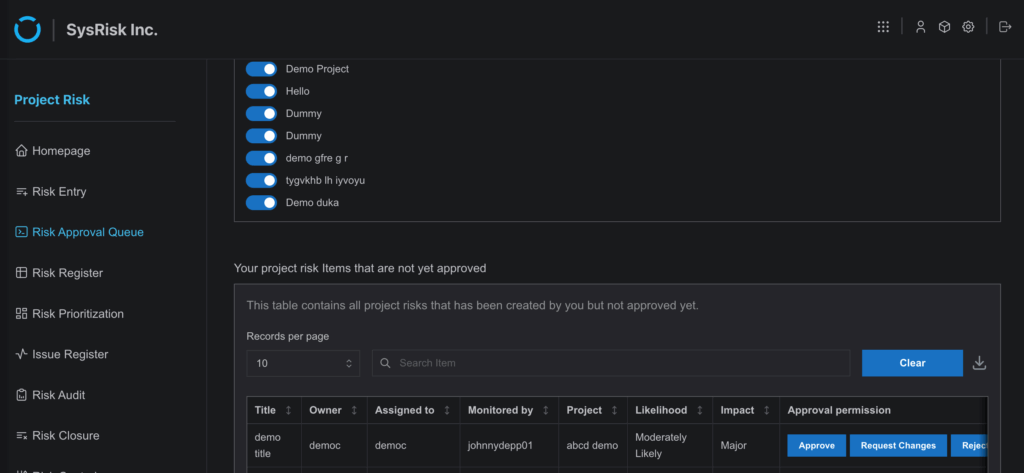
- Approve: The risk entry is added to the risk register with a unique ID and becomes active.
- Reject: The risk remains in the risk entry table and can be edited by the creator.
- Request Changes: The risk owner can add a note requesting changes, after which the risk is sent back for revision.
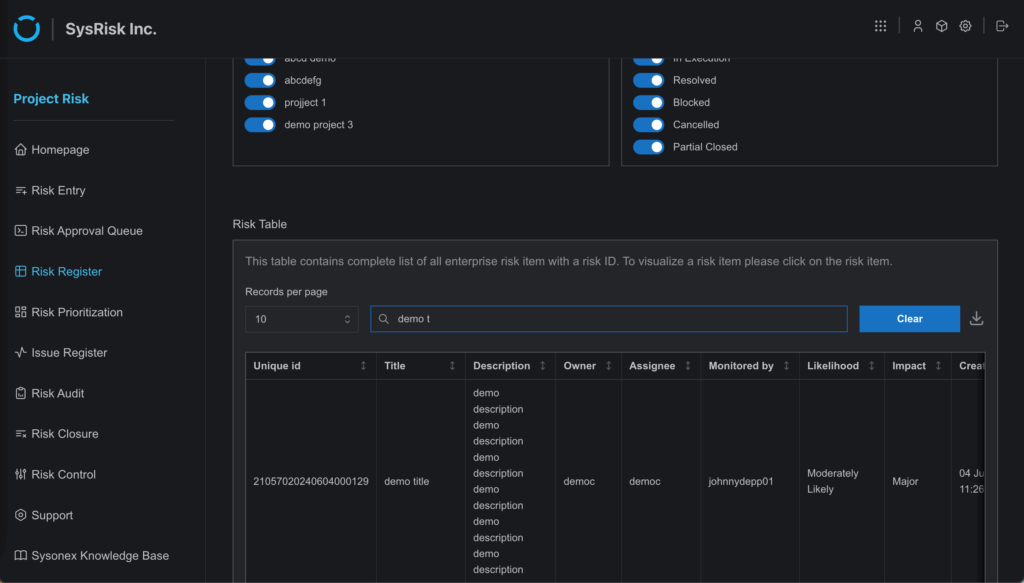
Once a risk is approved, it becomes active data in the Risk Register, viewable and editable by authorized users.
Key Features During Risk Management
- Editable Until Approval: Risk entries remain editable and viewable in the risk entry table until they are officially approved.
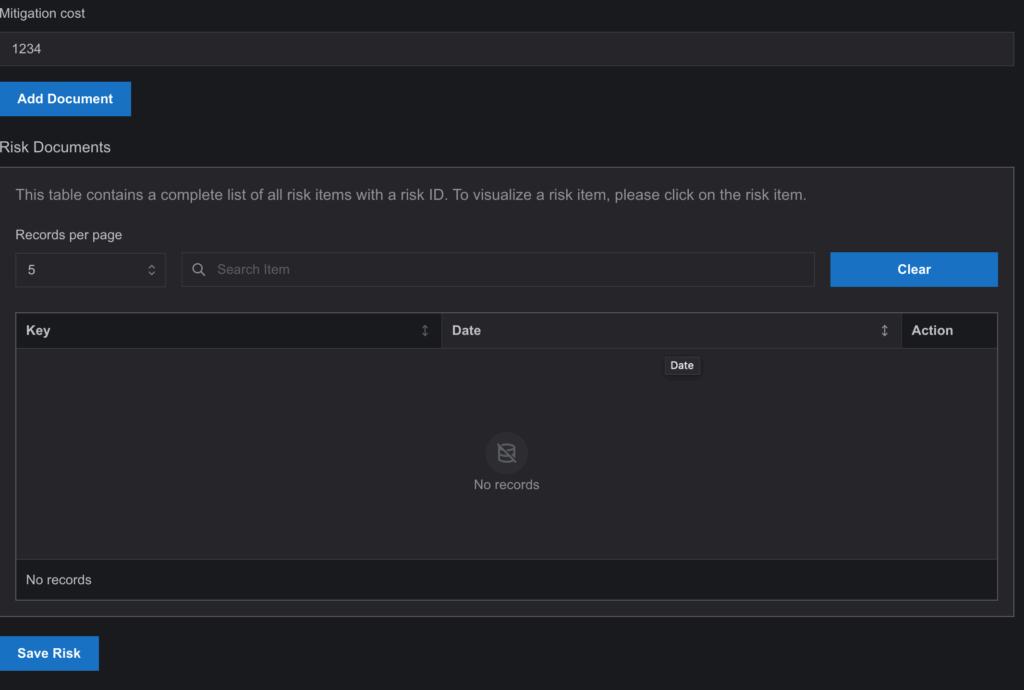
- Document Upload: Users can upload documents related to the risk entry through the Add Document feature in the Edit window.
- PostApproval Updates: Once approved, risk entries appear with a unique ID in Risk Register page and can be updated as needed, becoming part of SysRisk’s operable data set.
Importance of the Risk Entry Process
Creating a risk entry triggers all subsequent operations within SysRisk, such as:
- Statistics: The system generates insights based on active risks.
- Suggestions: Recommendations and mitigation strategies are made available.
- Updates: Ongoing monitoring and updates are applied to approved risks.
Since the risk entry is the most fundamental operation, ensuring its accuracy and approval is crucial. Properly stored risks also serve as valuable resources for addressing similar challenges in the future.
By following these steps, users can efficiently create, submit, and manage risk entries, ensuring that risks are correctly documented and approved within SysRisk.