How Can We Help?
-
FAQs
-
Sysrisk User Manual
-
- Getting Started
- Product Catalogue
- Purchase Process
- Login Process and Forgotten Password Revival Process
- User Creation and Role Assignment
- Customization and Dashboard Configuration
- Project Creation and User Adding Process
- Category Management
- Risk Entry Creation, Edit, and Approval
- Risk Creation Using AI
- Risk Approval Process
- Functionality of Risk Register & Risk Prioritization Page
- Issue creation
- Risk Logs: Administrative and User
- Risk Closure Complete Procedure
- Risk Notification Settings
- Support and Knowledge Base
- Company Profile And AI Risk Creation
- Risk Audit
- Show Remaining Articles (4) Collapse Articles
-
-
Risk Management
-
- Control Risk
- Enterprise Risk Management (ERM)
- Inherent Risk
- Qualitative Risk Analysis
- Quantitative Risk Analysis
- Residual Risk
- Risk Acceptance
- Risk Acceptance Criteria
- Risk Aggregation
- Risk Analysis
- Risk Analysis Methods
- Risk Analytics
- Risk Appetite
- Risk Appetite Framework
- Risk Appetite Statement
- Risk Appetite Statement
- Risk Assessment
- Risk Assessment Matrix
- Risk Assessment Process
- Risk Attribution
- Risk Avoidance
- Risk Bearing Capacity
- Risk Benchmarking
- Risk Capacity
- Risk Capital
- Risk Clustering
- Risk Communication
- Risk Communication Plan
- Risk Concentration
- Risk Contingency
- Risk Contingency Plan
- Risk Control
- Risk Convergence
- Risk Criteria
- Risk Culture
- Risk Dashboard
- Risk Dependency
- Risk Diversification
- Risk Escalation
- Risk Escalation Path
- Risk Evaluation
- Risk Exposure
- Risk Financing
- Risk Framework
- Risk Governance
- Risk Heat Map
- Risk Horizon
- Risk Identification
- Risk Indicator
- Risk Intelligence
- Risk Interdependency
- Risk Inventory
- Risk Landscape
- Risk Management(RM)
- Risk Management Dashboard
- Risk Management Framework
- Risk Management Maturity
- Risk Management Plan
- Risk Management Policy
- Risk Mapping
- Risk Matrix
- Risk Maturity
- Risk Mitigation
- Risk Mitigation Plan
- Risk Mitigation Strategy
- Risk Model
- Risk Monitoring
- Risk Optimization
- Risk Owner
- Risk Ownership
- Risk Policy
- Risk Portfolio
- Risk Prioritization
- Risk Profile
- Risk Quantification
- Risk Reduction
- Risk Register
- Risk Register Update
- Risk Reporting
- Risk Resilience
- Risk Response
- Risk Response Plan
- Risk Review
- Risk Review Process
- Risk Scenario
- Risk Scenario Analysis
- Risk Scenario Planning
- Risk Scoring
- Risk Sensing
- Risk Sharing
- Risk Strategy
- Risk Taxonomy
- Risk Threshold
- Risk Tolerance
- Risk Tolerance Level
- Risk Transfer
- Risk Transparency
- Risk-Adjusted Return
- Show Remaining Articles (83) Collapse Articles
-
- Business Continuity Risk
- Capital Risk
- Competition Risk
- Compliance Risk
- Counterparty Risk
- Credit Risk
- Credit Spread Risk
- Currency Risk
- Cybersecurity Risk
- Cybersecurity Risk
- Deflation Risk
- Environmental Risk
- Environmental Risk
- Ethical Risk
- Event Risk
- Financial Risk
- Foreign Exchange Risk
- Fraud Risk
- Fraud Risk
- Geopolitical Risk
- Health and Safety Risk
- Human Capital Risk
- Inflation Risk
- Inflation Risk
- Infrastructure Risk
- Innovation Risk
- Innovation Risk
- Insurance Risk
- Intellectual Property Risk
- Interest Rate Risk
- Legal Risk
- Liquidity Risk
- Liquidity Risk
- Market Risk
- Model Risk
- Natural Disaster Risk
- Operational Risk
- Operational Risk
- Outsourcing Risk
- Political Risk
- Product Liability Risk
- Project Risk
- Regulatory Change Risk
- Regulatory Risk
- Reputation Risk
- Reputation Risk
- Reputational Risk
- Resource Risk
- Sovereign Risk
- Strategic Alliance Risk
- Strategic Risk
- Strategic Risk
- Supply Chain Risk
- Sustainability Risk
- Systemic Risk
- Technological Risk
- Technology Risk
- Show Remaining Articles (42) Collapse Articles
-
In SysRisk, we offer two modules: Enterprise Risk Management (ERM) and Project Risk Management (PRM).
- ERM Module: Risks are categorized by specific categories such as pure, financial, business, operational, etc.
- PRM Module: Users must create a project first, then they can create risk entries related to that project.
While Admins and Product Admins can access all risks, regular users can only access risks to which they have been granted access.
In this section, we will demonstrate how to create a project and subsequently add users to enable them to create and manage risk items within that project.
To create a Project
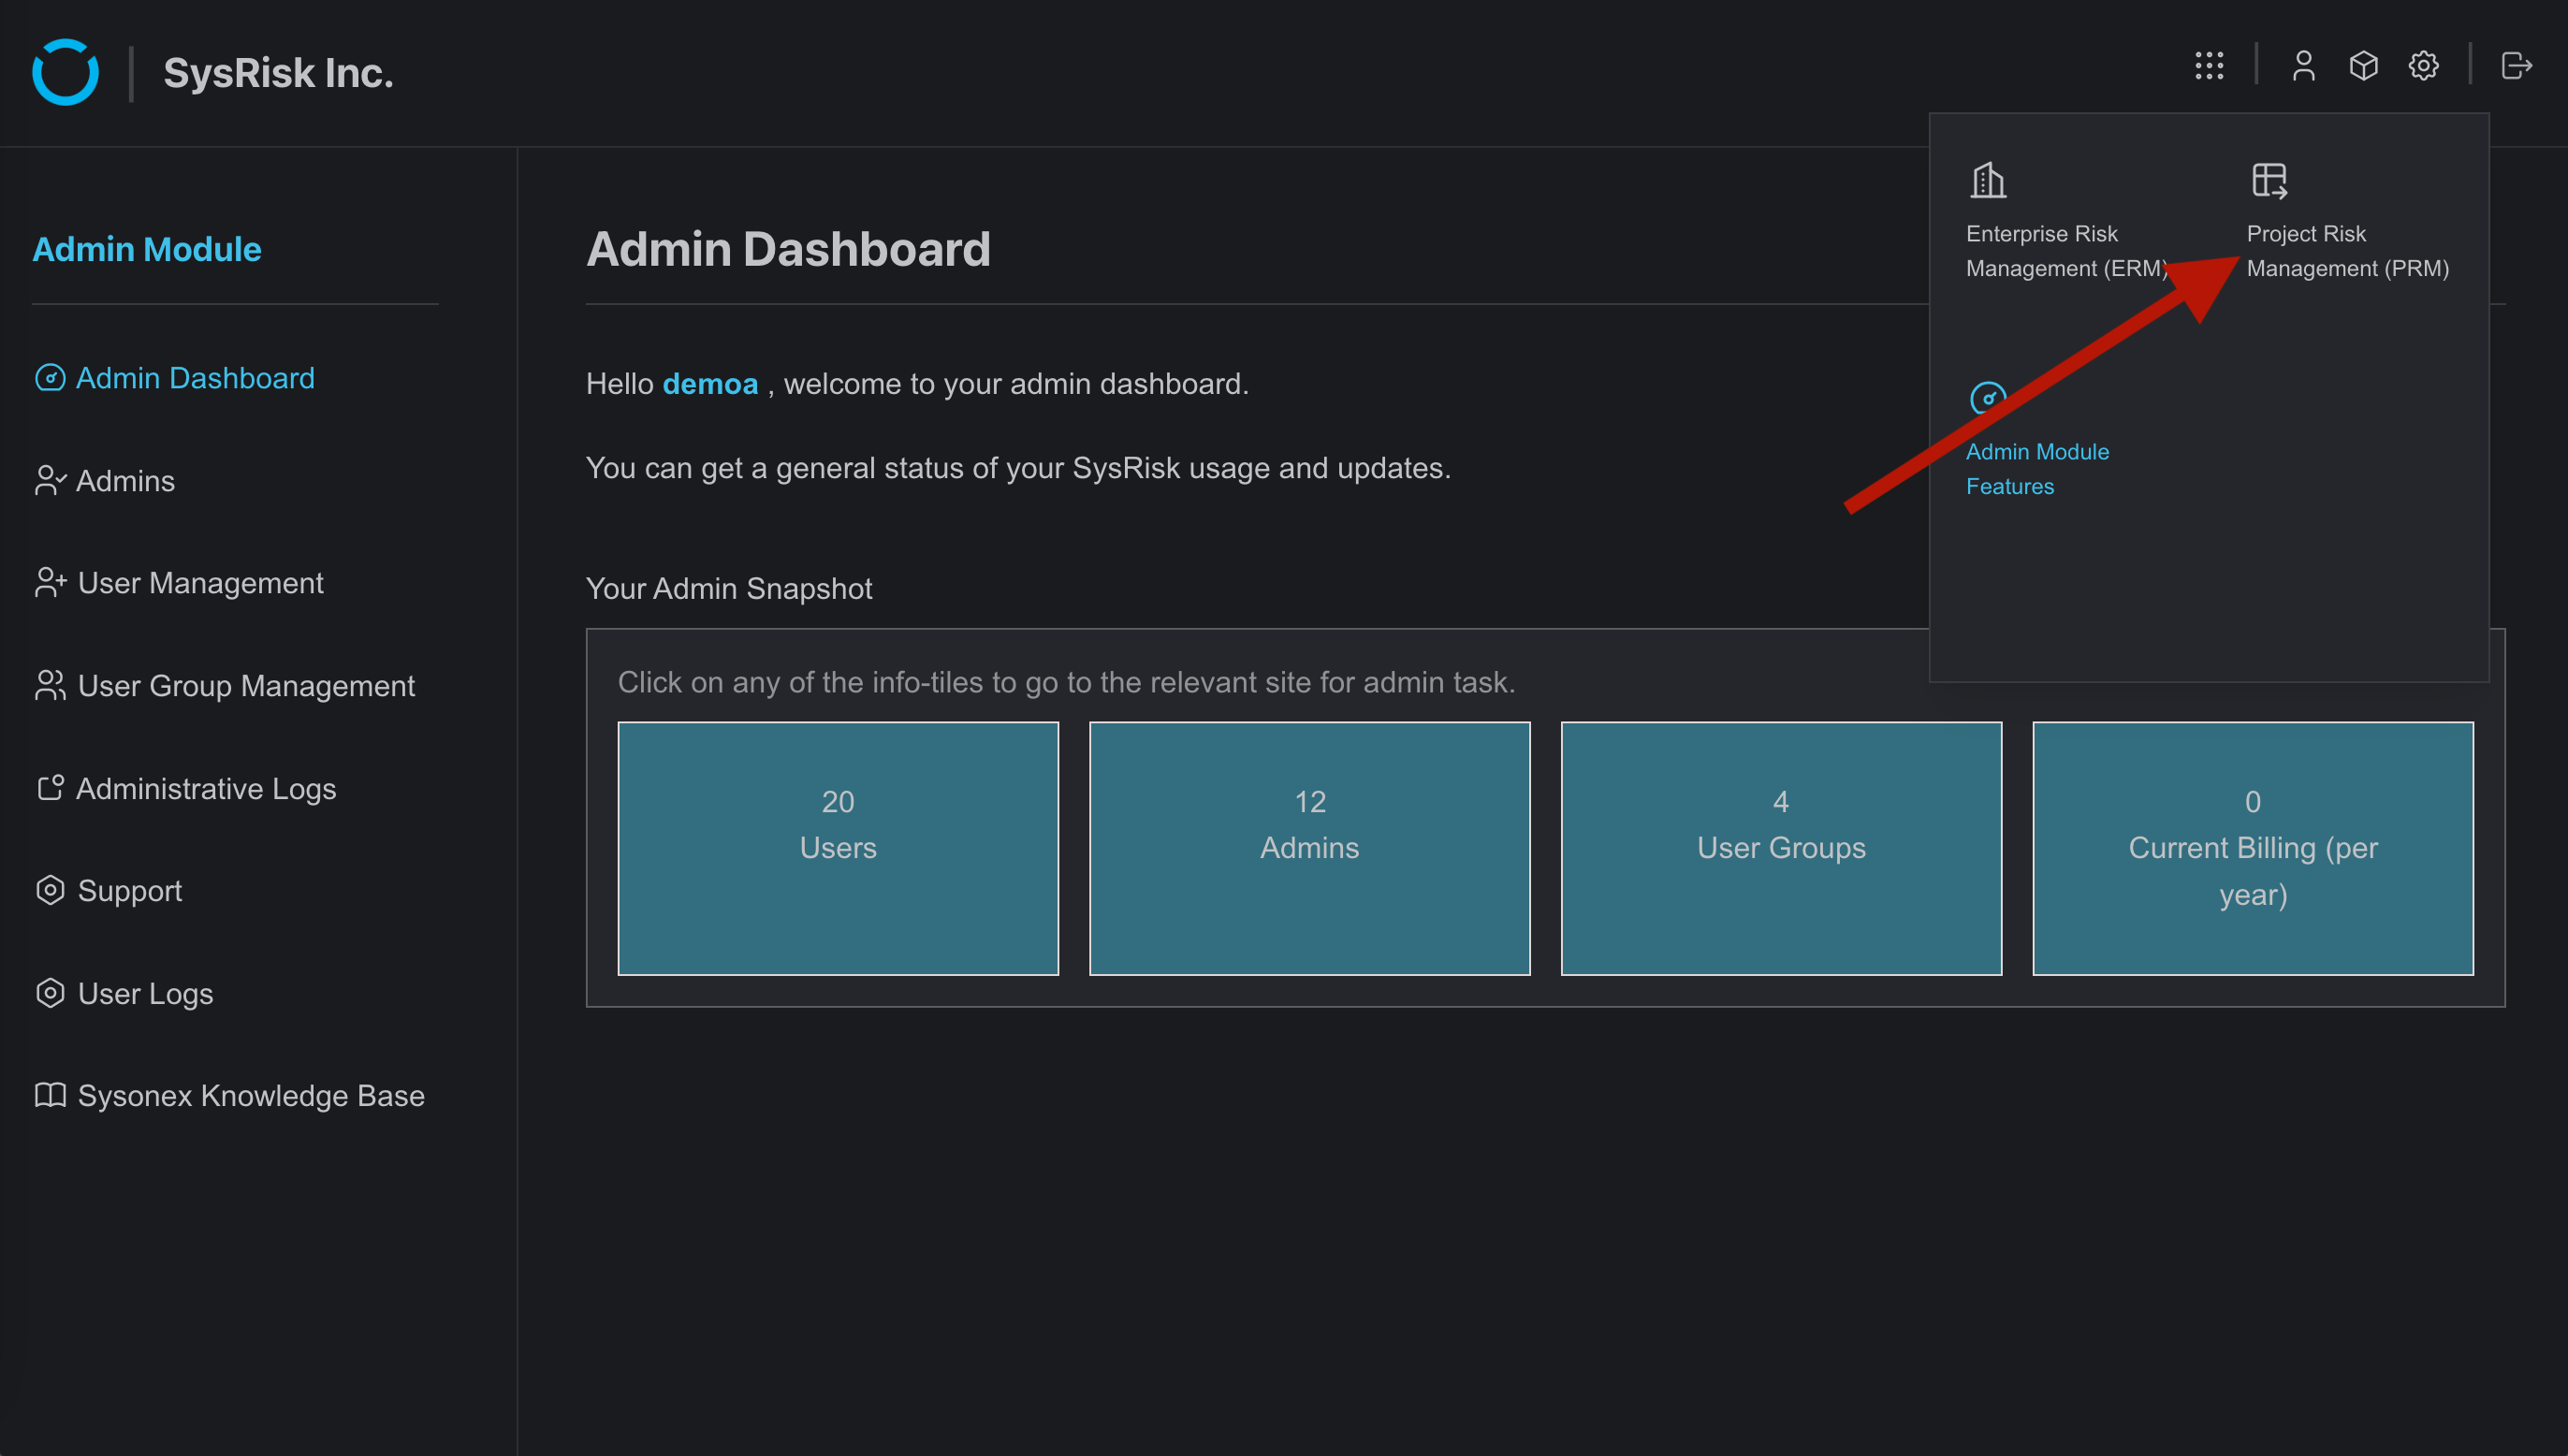
- First, the user (admin or product admin) must log in to SysRisk and navigate to the PRM (Project Risk Management) module.
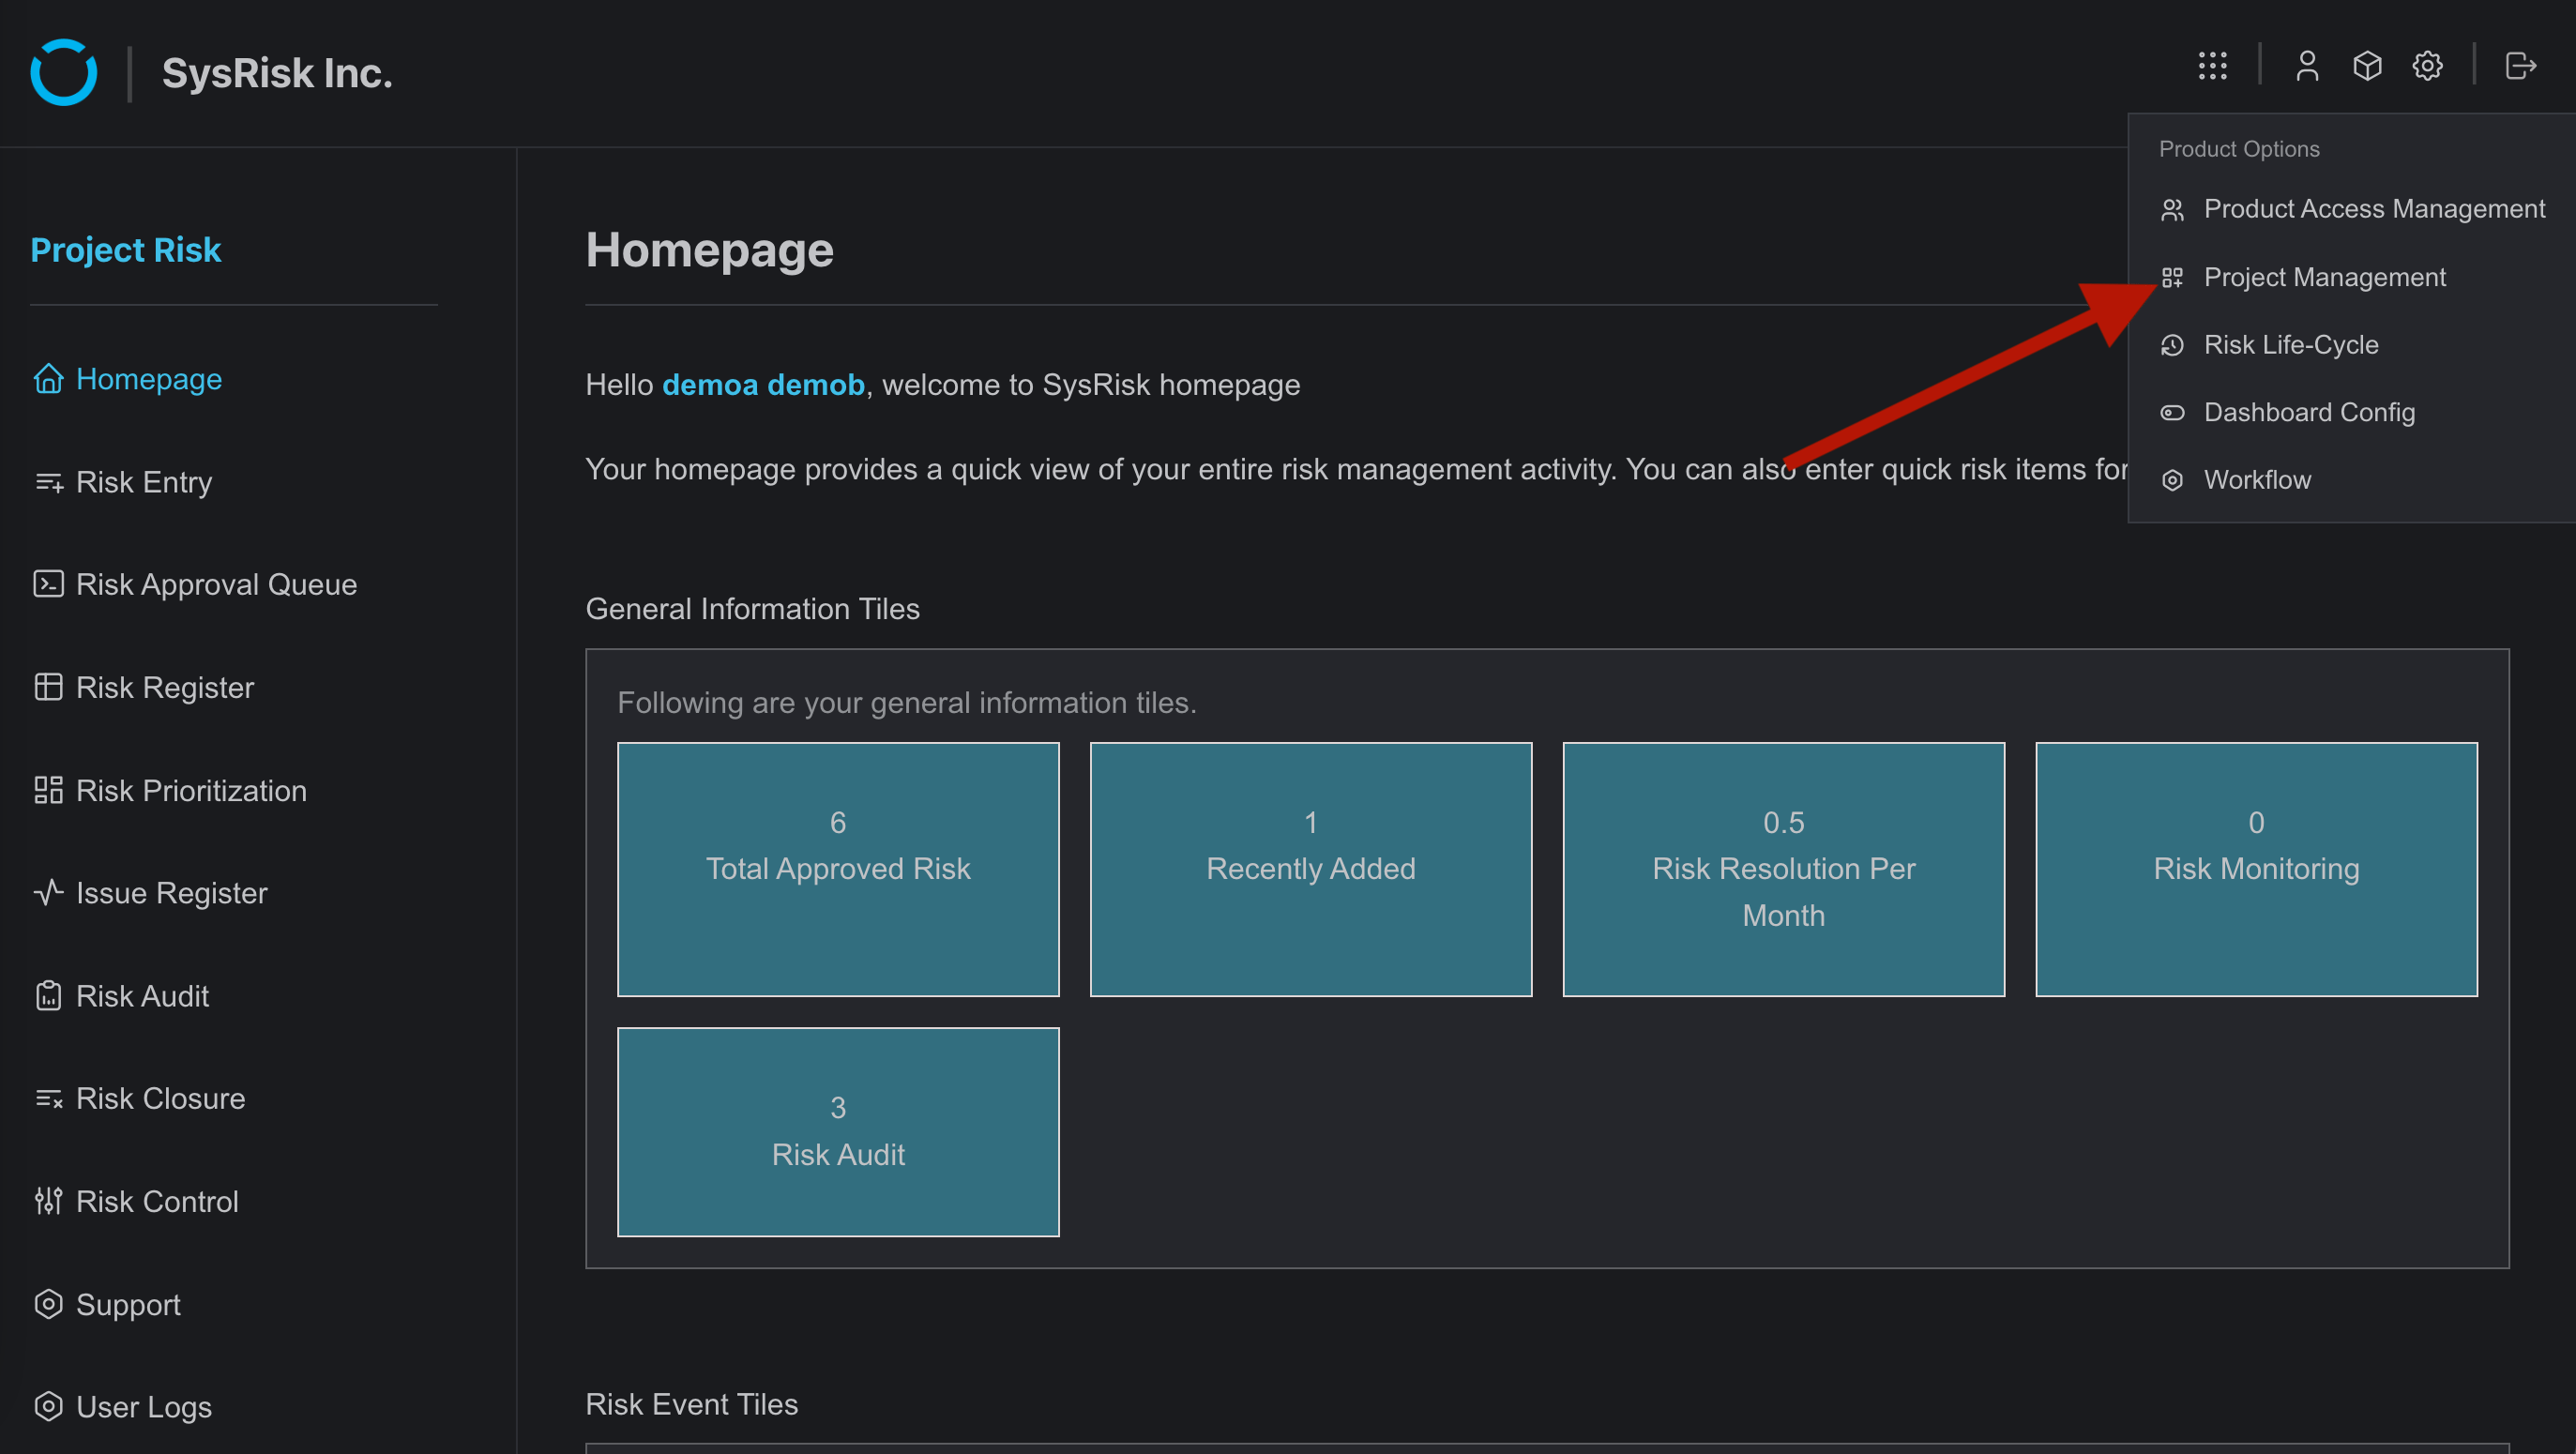
- Then, proceed to the Project Management page.
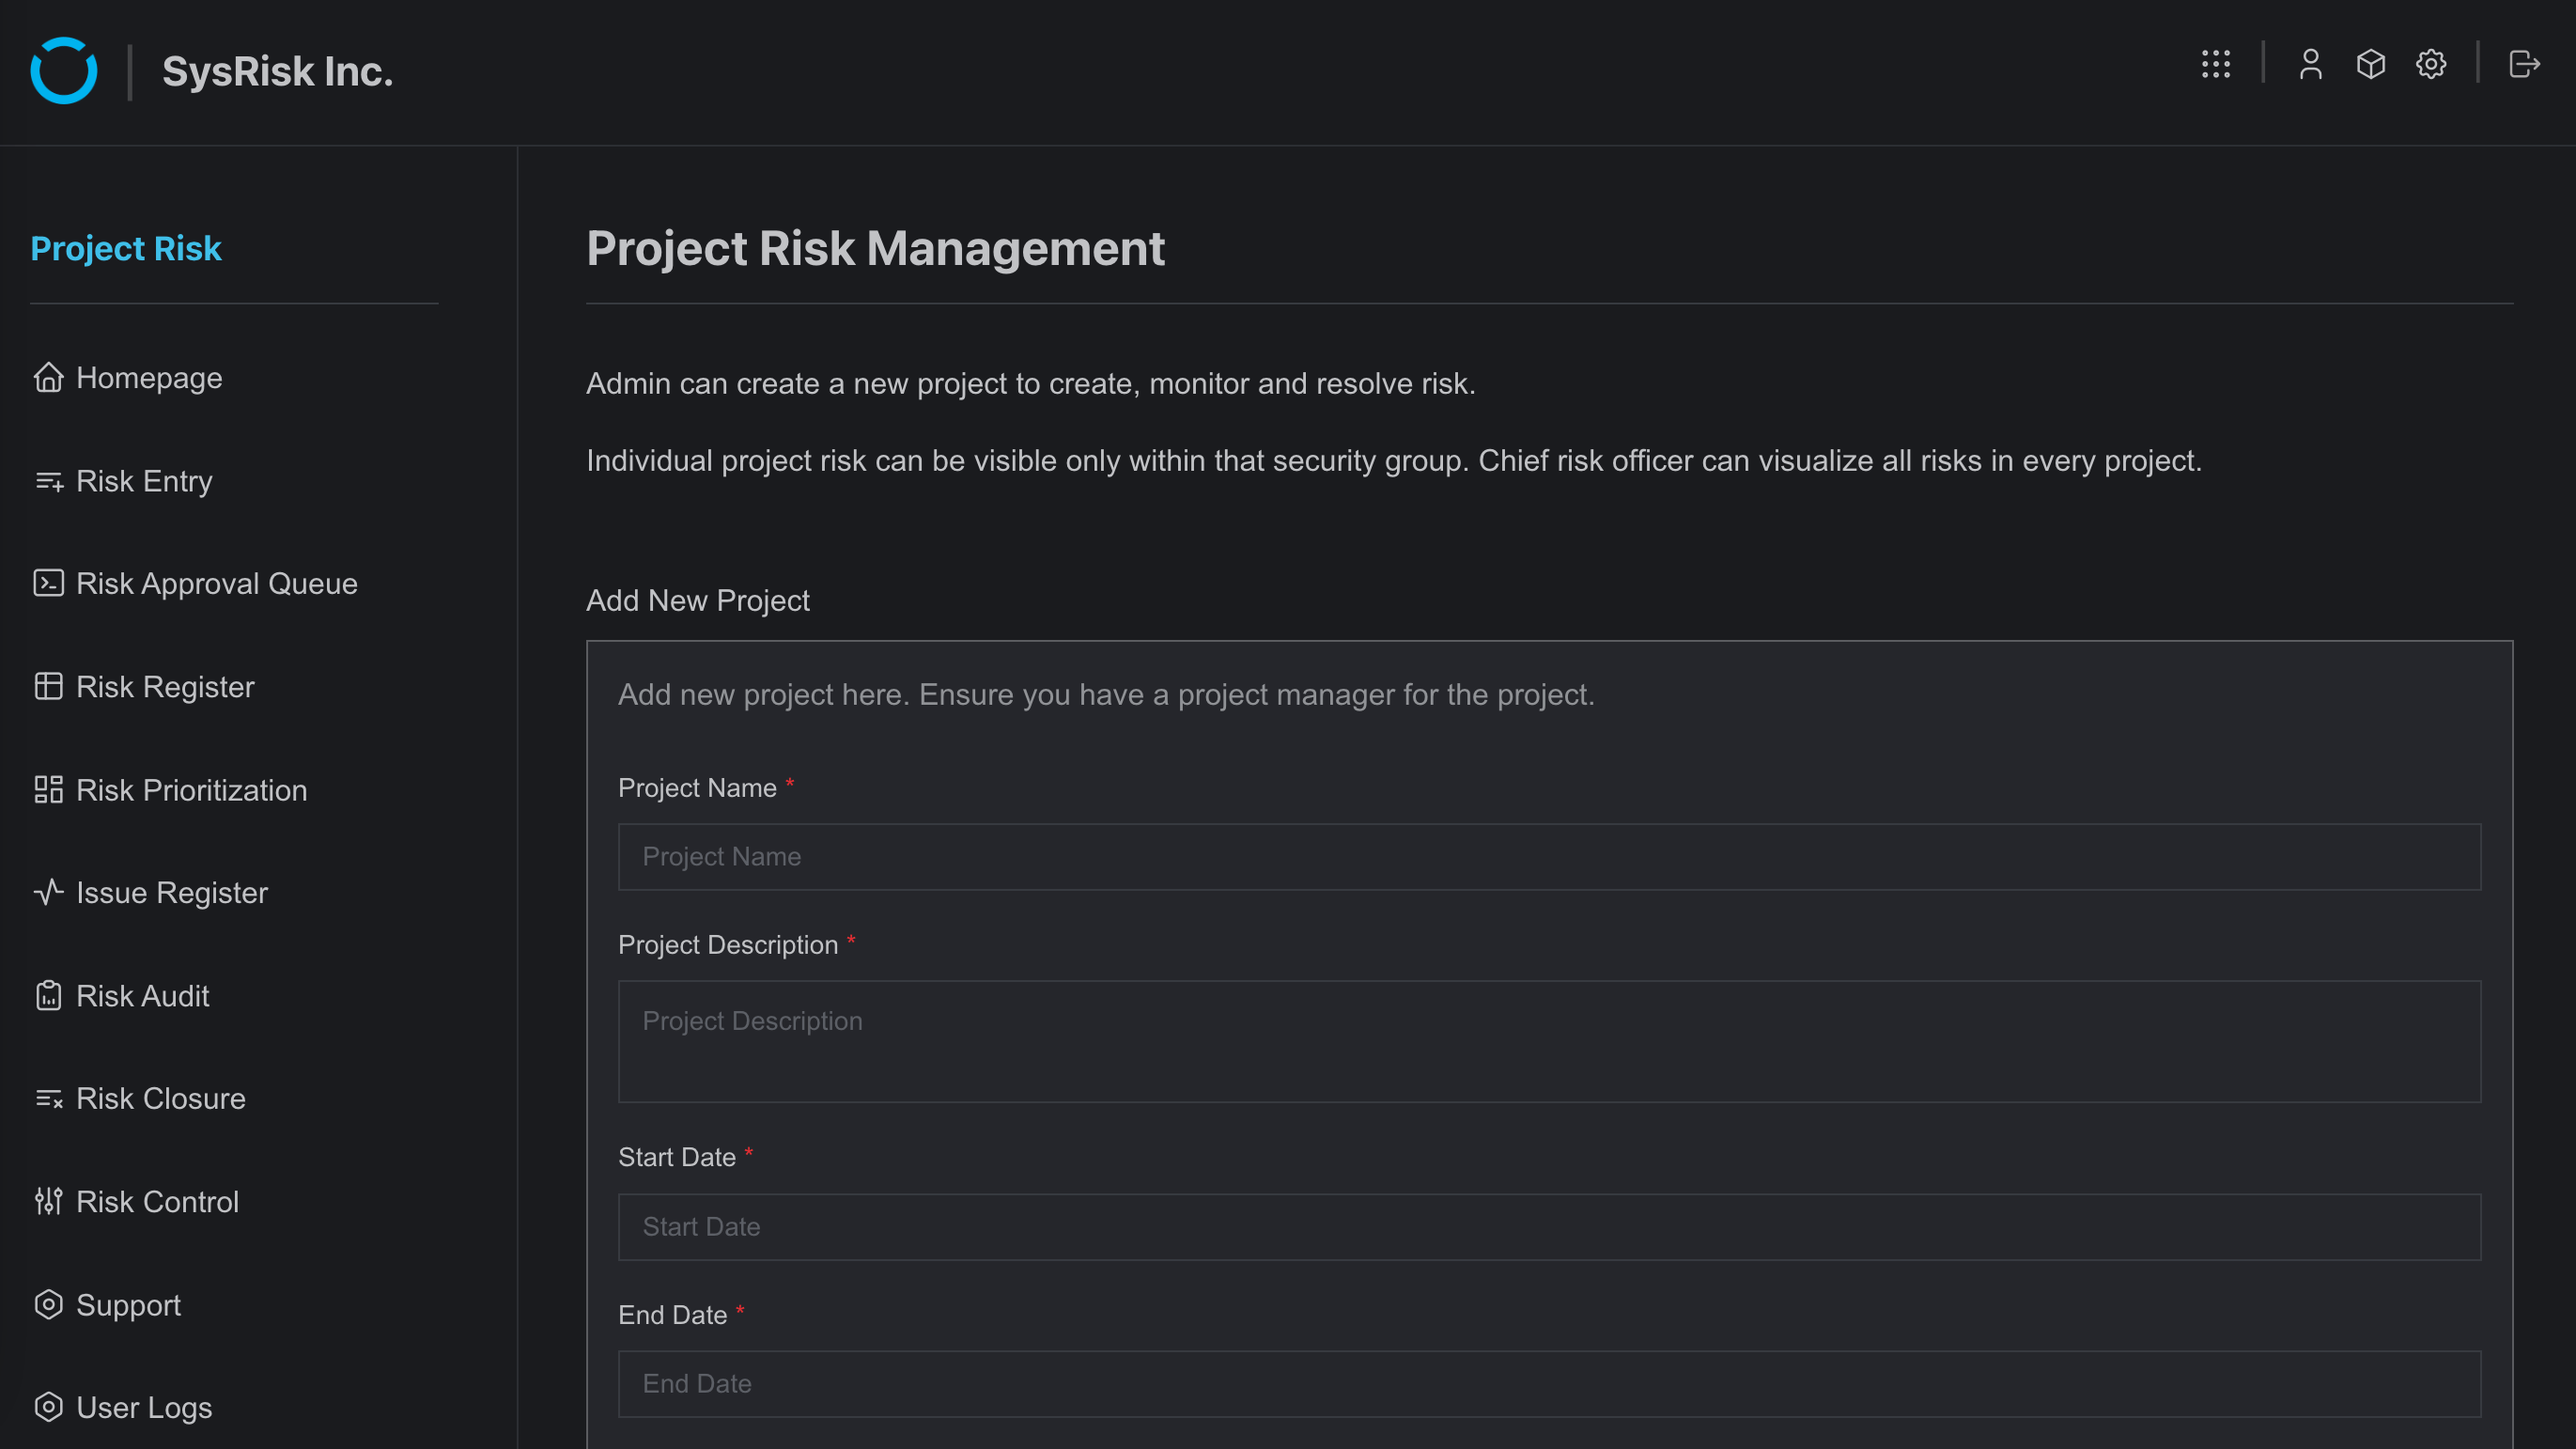
- A new project creation form will appear.
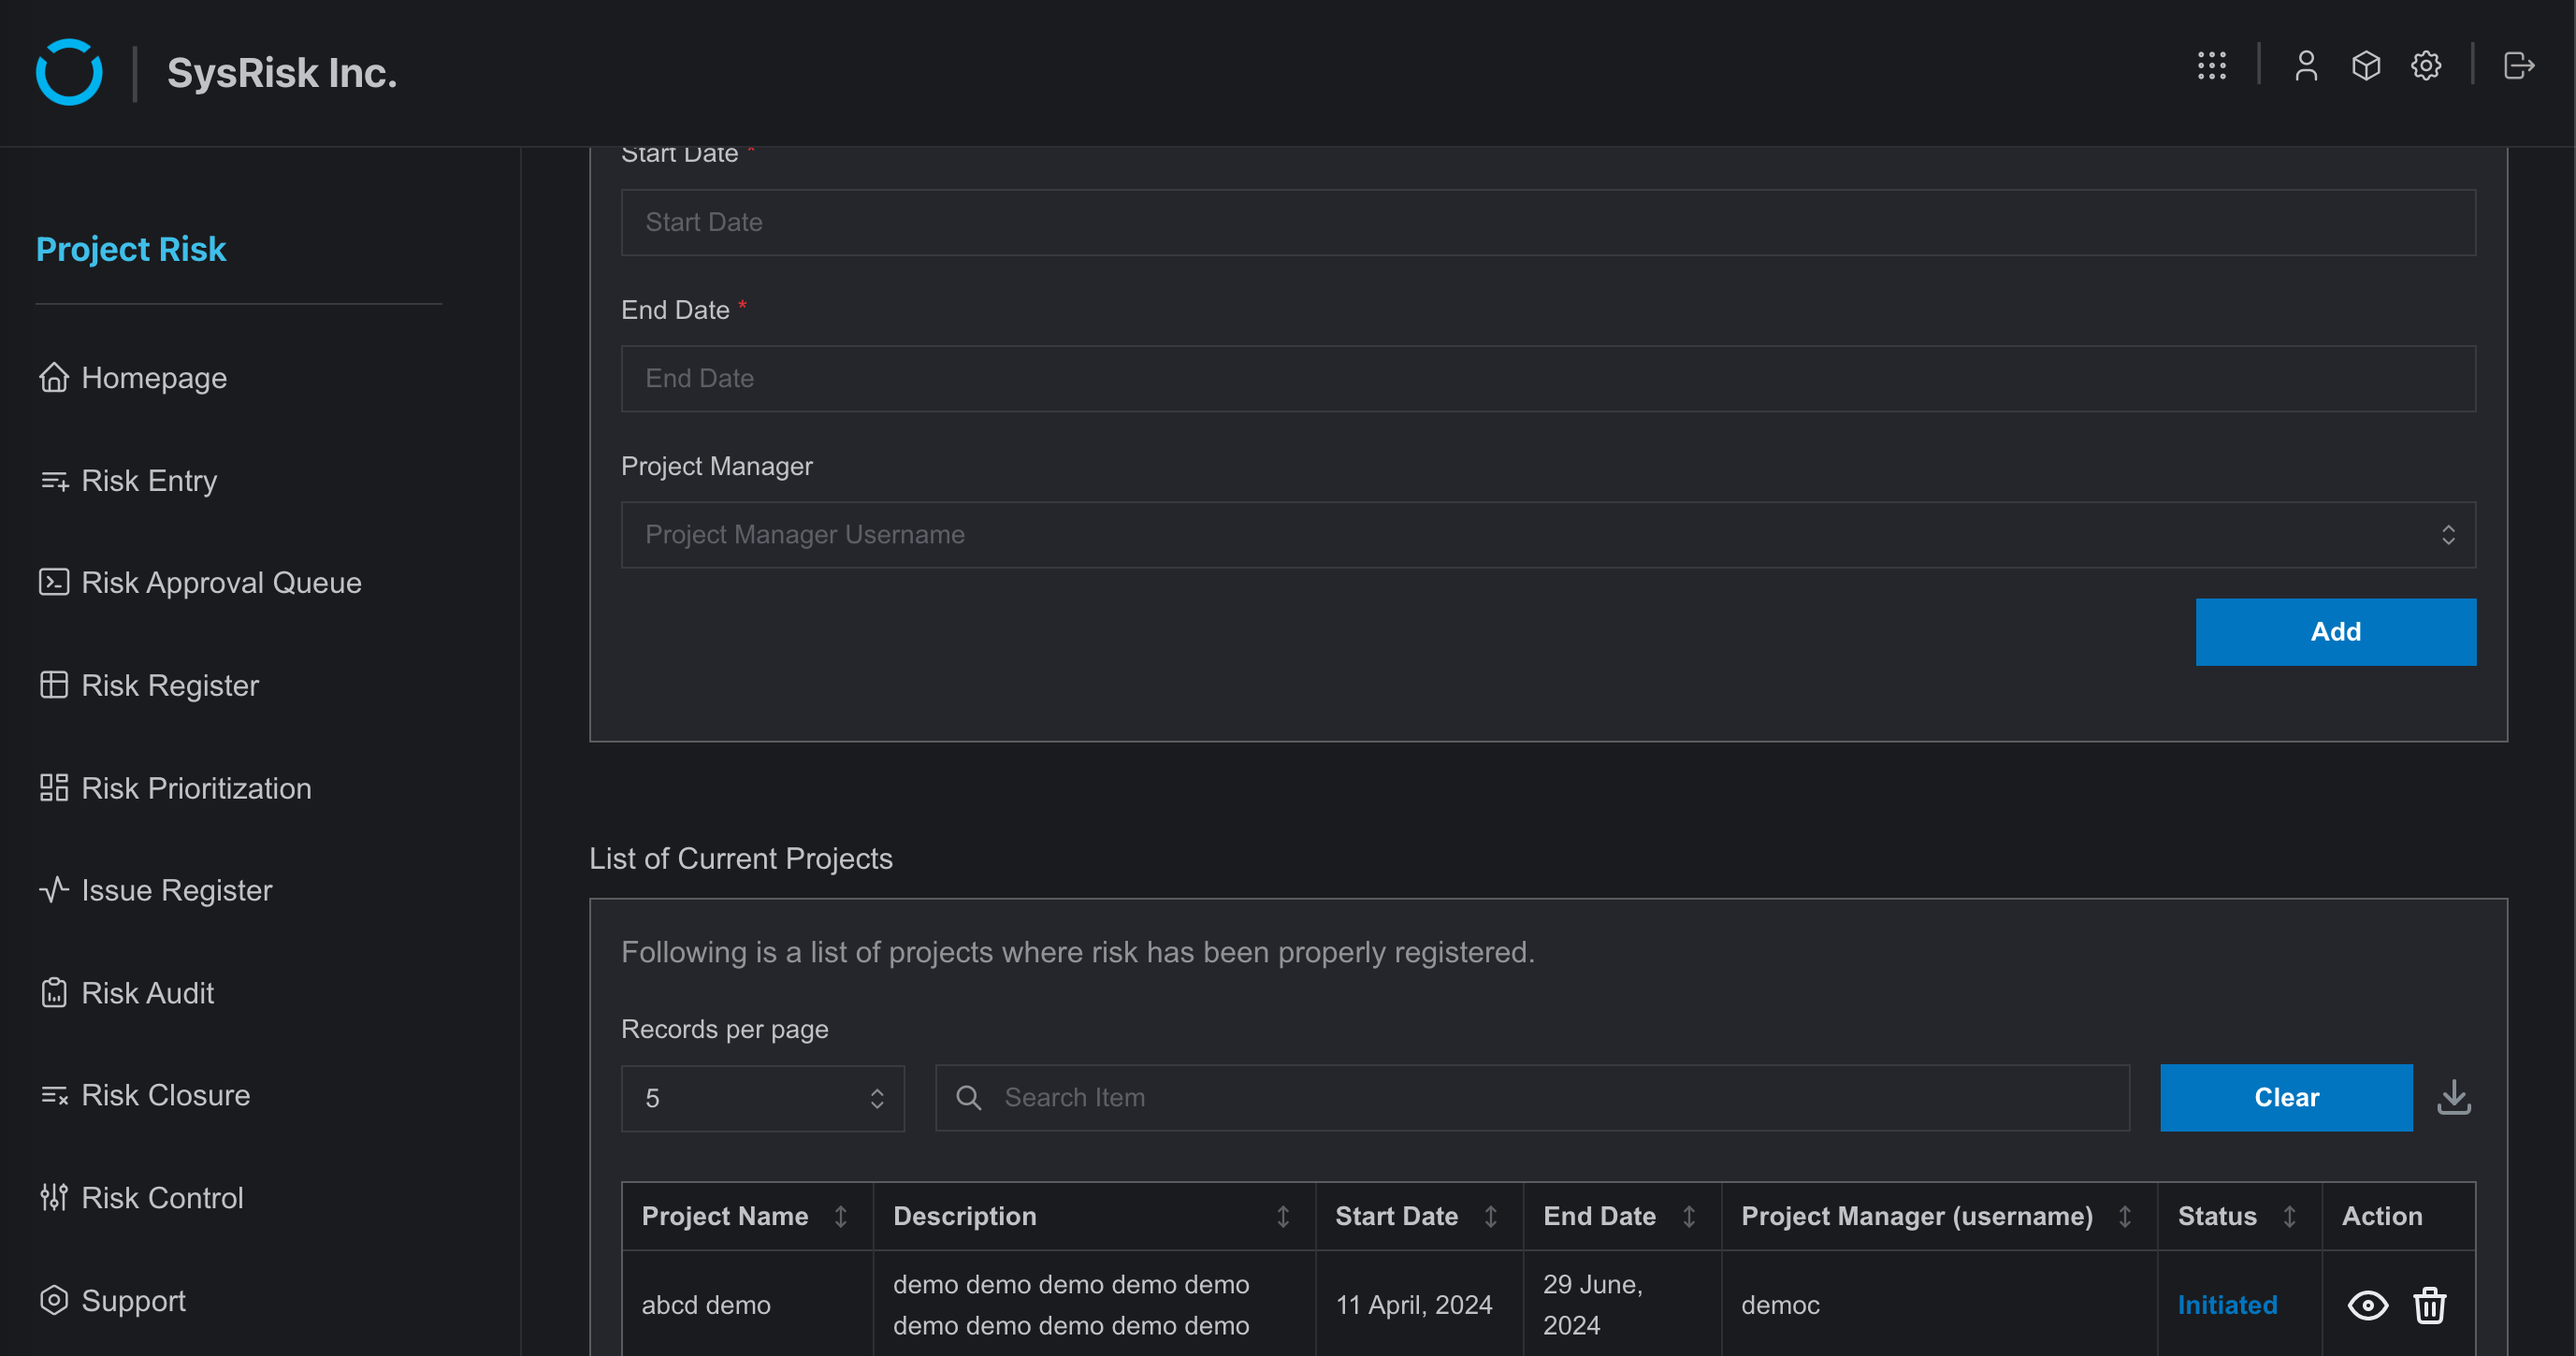
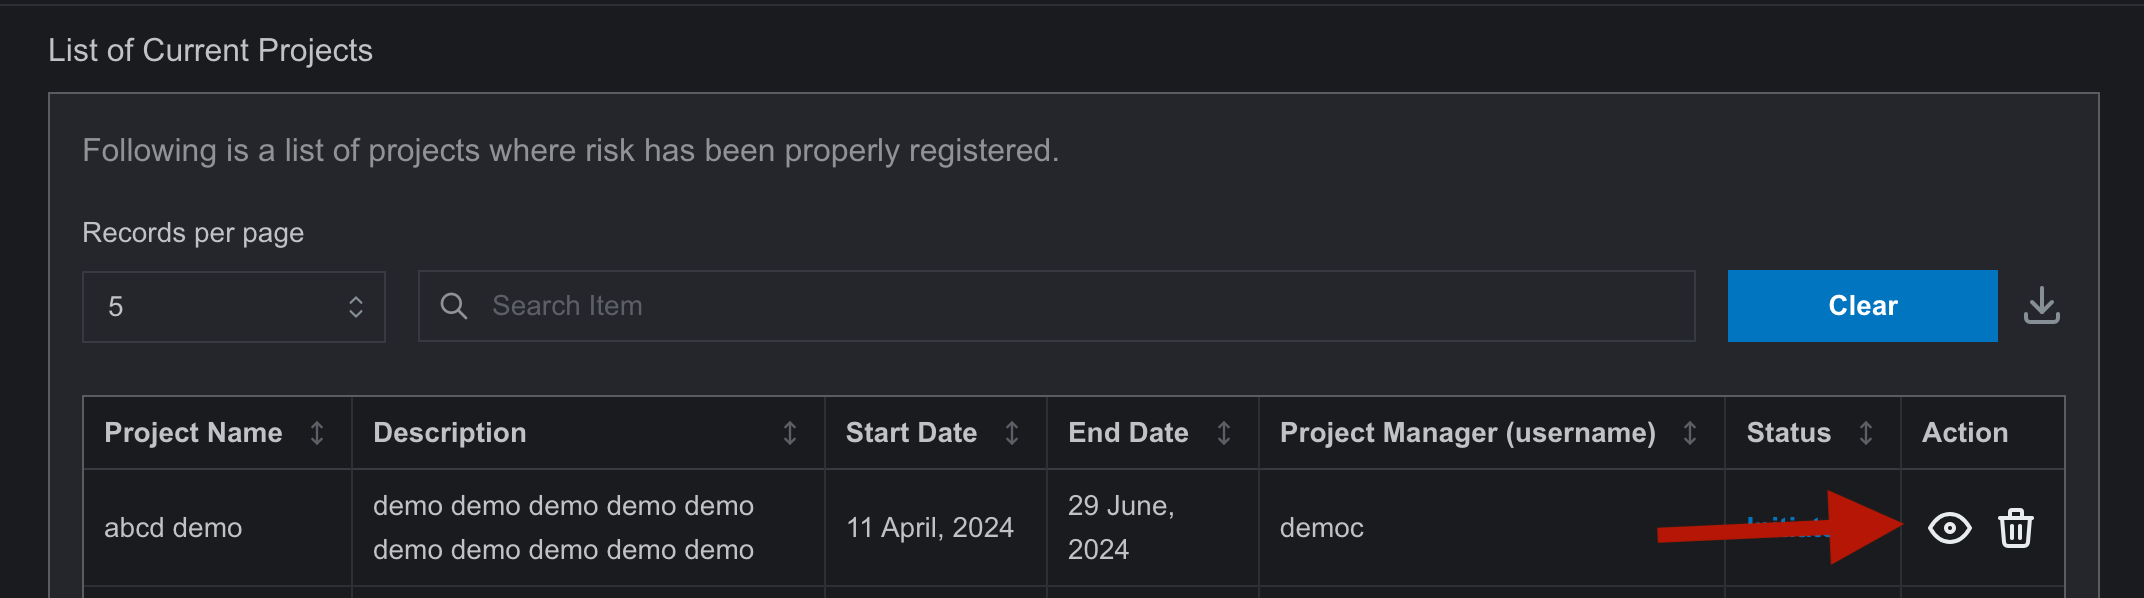
- Fill in the required information and click “Add” to create the project. Once the project is created, it will appear in the “List of Current Projects” table at the bottom of the same page.
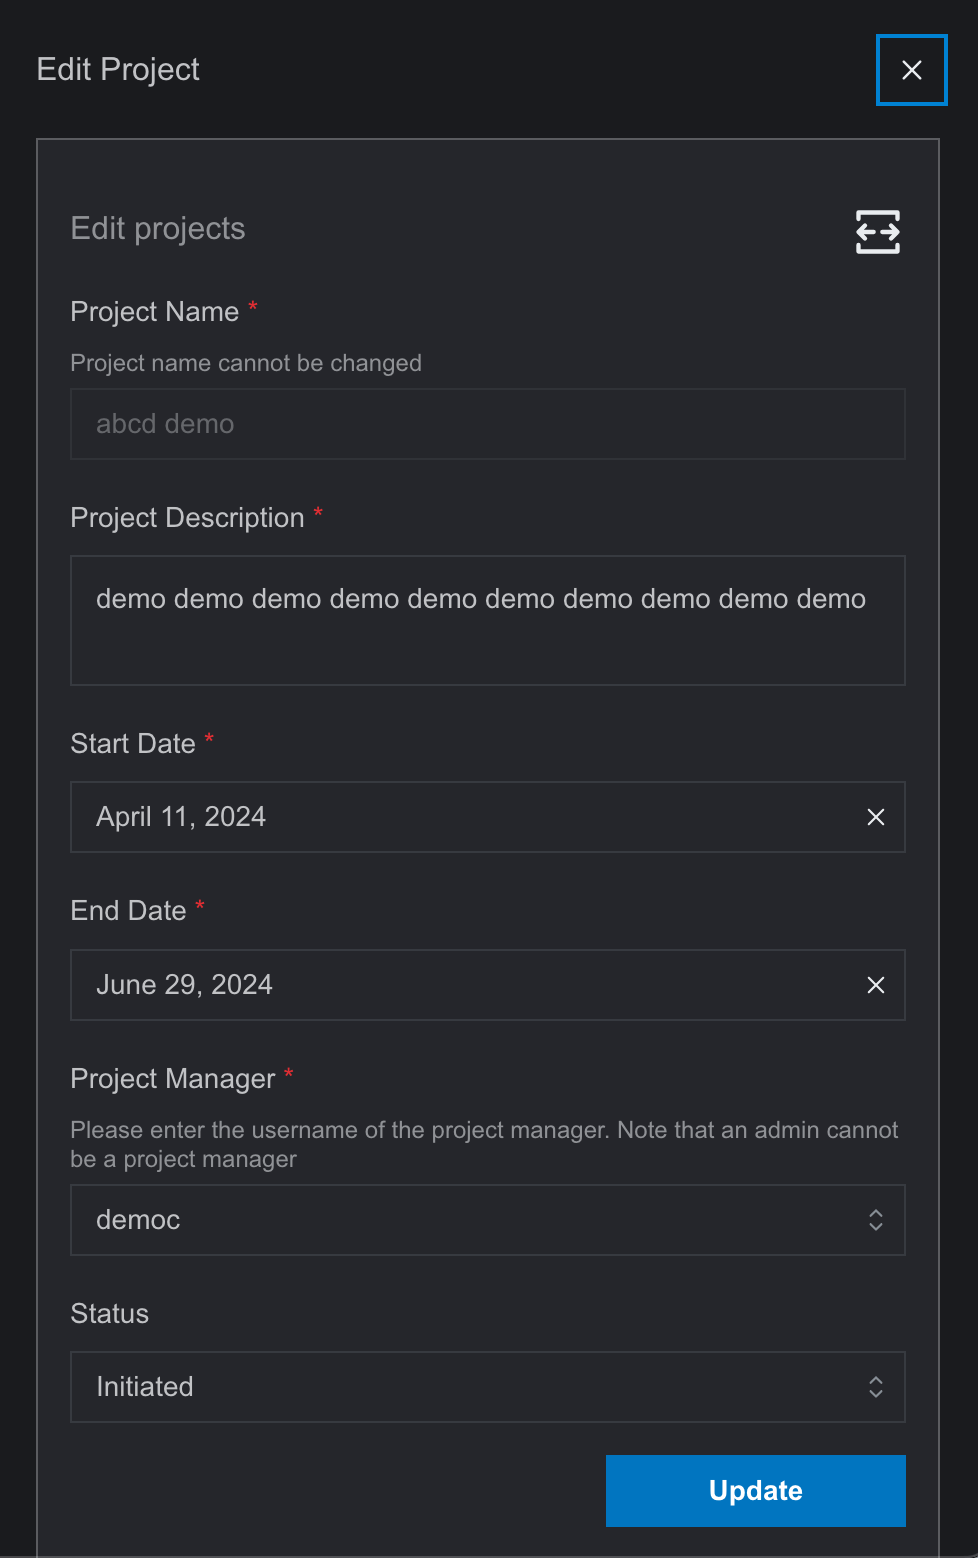
- In this table, clicking the “bin” icon in the action column allows the user to easily delete the project. Clicking the “eye” icon in the same column will open a side drawer where the user can edit the project information.
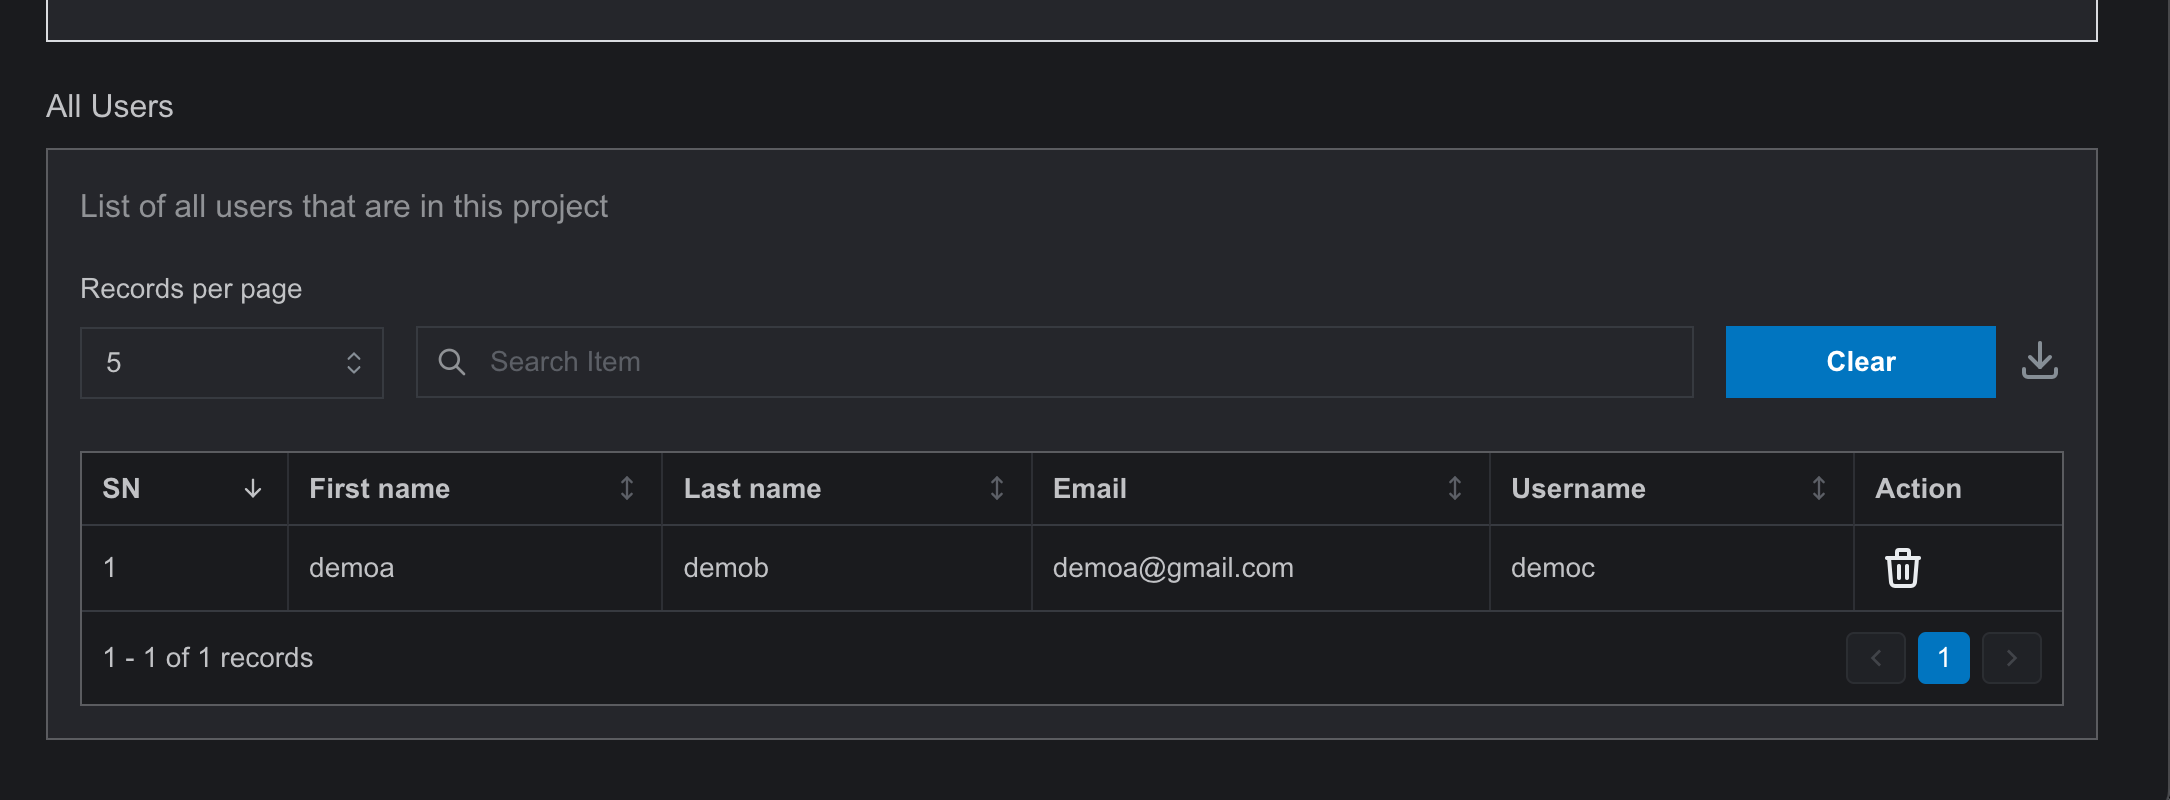
- Additionally, clicking the expand icon in the top right of the side drawer leads to a sub-page where the user can add other users to the project for risk management. Editing options are also available on this sub-page.
- The list of user that are added in the project will be visible at the end of the sub-page.
Note:
General users also have access to the Project Management page. However, they can not create a project or edit them. They can only view the informations regarding the project and create risk entries.